THE GUAC RECIPE I NEVER GAVE YOU OUR FRESHMEN YEAR

It’s been two years now since my freshmen year, and what a two years it’s been. Many things have changed, but one thing has remained a constant throughout my time in college — all of my closest friends have asked me for my guacamole recipe at one point or another.

In two years from now, we’ll all be out in the real world living totally different lives than the ones we live today. I’ve definitely had my fair share of memories in college, but there’s one in particular that always comes back to me when I think about my time in Austin. On Sunday nights in the spring of freshmen year, my friends and I would pile on to my cheap couch to watch our favorite show (Hint: This recipe was almost titled “Guac of Thrones”). Absolute silence was demanded with the exception of one thing — the crunch of a blue tortilla chip loaded with guacamole meeting its final destination, our mouths.

As for the recipe itself, it is a result of many trial and error sessions with my friends. I’ve tried different types of tomatoes, using different fruits instead of mangos, orange juice, and many other secret ingredients. In all, I’ve probably tried over 30 different variations of this recipe, but this variation is the champion of them all. I’ve never shared it publicly, but my hope is that it finds its way onto your coffee table surrounded by the ones you love and care about the same way it did for me.

Enjoy!

LIST OF INGREDIENTS

makes enough for 5 hungry college freshmen.

prep time: 30 minutes

IN THE KITCHEN

  • 3-4 avocados, pitted and peeled
  • 2/3 cup mango, skinned and diced
  • 2 roma tomatoes, diced (toss out the juicy center)
  • 1/3 cup of cilantro ( I usually put more… but that’s because I love cilantro.)
  • 1/3 cup of red onion, diced
  • 1 jalapeño, seeded and finely chopped (Don’t. Touch. Eyes.)
  • 1 tablespoon fresh garlic, finely chopped (or mintzed… see what I did there Phoebe?)
  • juice of 1 lime
  • 1 teaspoon salt (not tablespoon… I’ve made that mistake several times… Erin I’m looking at you.)

AT THE STORE / WHAT TO BUY

  • 3-4 avocados  (depending on how big they are… and get ’em relatively soft)
  • 1 red mango (it should be kind of squishy.)
  • 2 roma tomatoes
  • 1 bunch of cilantro
  • 1 red onion
  • 1 jalapeño
  • 1 lime
  • salt
  • don’t forget tortilla chips! If they have lightly salted, that’s your best option.

INSTRUCTIONS

  • pit and peel avocados.
  • mash avocados to desired consistency in a large bowl.
  • skin and dice mango and add 2/3 cup into bowl.
  • dice roma tomatoes, tossing out the juicy center. Add to bowl.
  • finely chop 1/3 cup of cilantro and add to bowl.
  • dice 1/3 cup of red onion and add to bowl.
  • seed and finely chop 1 jalapeño and add to bowl.
  • finely chop or mince 1 tablespoon of fresh garlic and add to bowl.
  • juice 1 lime and add to bowl.
  • add 1 teaspoon of salt to bowl.
  • mix ingredients thoroughly with a spoon.
  • optional/recommended: chill for 1 hour before serving.
  • serve in a bowl with tortilla chips.

Christmas French Toast Strata

It’s Christmas morning and I hear mom’s clanging of the coffee mugs muffled by the family room’s roar of “A Christmas Story.” The smell of cinnamon fills my lungs as my mom busily works away at her golden-brown masterpiece above the oven’s warmth. “I need twenty more minutes, girls, and then we can start,” she’d say every Christmas morning, as if that wasn’t an eternity.

With wrapping paper sprawled all over the living room floor, we dove into the rich perfection and rubbed our bellies. It was finally Christmas.

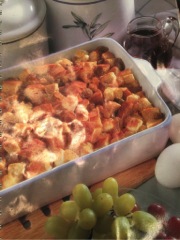
christmas-french-toast-strata

PHOTO: Taken from One-Dish Collection: 3 Cookbooks in 1- Publications International

My mom found this recipe in the “One-Dish Collection: 3 Cookbooks in 1” cookbook. From my family to yours, Merry Christmas and enjoy!

Ingredients (feeds up to 6 people):

  • 4 ounces of day-old French or Italian bread, cut into ¾ inch slices
  • 1/3 cup golden raisins
  • 3 ounces of cream cheese, cut into ¼ inch slices
  • 3 eggs
  • 1 ½ cups of milk
  • ½ cup maple syrup
  • 1 teaspoon of vanilla
  • 2 tablespoons of sugar
  • 1 teaspoon of ground cinnamon
  • Optional: Additional maple syrup

Materials:

  • 11 x7 baking dish
  • Non-stick cooling spray
  • Medium and small-sized mixing bowls
  • Electric mixer

Process:

  • Spray non-stick cooling spray on 11 x7 baking dish before layering ¾ inch bread slices evenly in dish. Dust golden raisins and cream cheese over bread slices.
  • Beat eggs with electric mixer in medium-sized mixing bowl until fully blended. Add milk, maple syrup and vanilla and mix well.
  • Pour egg mixture carefully over layer of bread slices.
  • Cover baking dish and refrigerate for 4 hours (or overnight).
  • After dish has set for at least 4 hours, preheat oven to 350°
  • Mix sugar and cinnamon in small bowl. Then, sprinkle a layer over bread.
  • Uncovered, bake for 40 to 45 minutes or until golden brown.
  • Drizzle additional maple syrup over the top for a richer taste.


Let cool, cut into slices and enjoy!

White Chicken Chili

by Lexi Hill

Total Time: 30 mins       Yield: 8-10 cups


I LOVE cooking. It’s one of my favorites activities (as is eating), but some days I’m just not feeling it. Days like that usually end with me ordering an artery-clogging patty melt or a burrito bigger than my head from fast food restaurants. In an effort to help me out on the days I don’t feel like cooking for myself, my boyfriend made a New Year’s resolution to learn how to cook so I could still have delicious, homemade meals that won’t leave me feeling nasty afterwards. I’m looking at you, Whataburger.

Here’s a recipe I have made tons of times, and have used as a way to teach my boyfriend a handful of basic cooking techniques that he can apply to dozens of other recipes. From this chili, he’s learned how to cook meat, chop vegetables, and season a dish… and it only takes about half an hour! Even for the most inexperienced cooks out there, this one is sure to produce a hearty and healthy meal that tastes AMAZING.

Enjoy!

INGREDIENTS:

  • 3-4 boneless chicken breasts

  • 4 cups chicken stock

  • 2 (15 oz) cans white beans

  • 2 (4 oz) cans green chilis

  • 1/2 onion, white or yellow

  • 3-4 jalapeños

  • 4 cloves garlic

  • 2 teaspoons cayenne pepper

  • 2 teaspoons cumin

  • 2 teaspoons paprika

  • Salt & pepper, to taste

DIRECTIONS:

  1. Pour chicken stock into a large pot, then add the chicken breasts. Cook over medium heat (5-6 setting on stove) for about 15 minutes. Check to make sure the meat is cooked all the way through by cutting into the middle of the breast. If there’s no pink on the inside, you’re good to go; if there is still pink, cook for a minute or two longer and check again. Repeat this checking process until there’s no more pink inside the chicken.
  2. While you’re waiting on the chicken to cook, use this time to chop up your veggies.
  3. When chicken is done, remove from the pot and shred it using your preferred method, then add it back to the pot you cooked it in.
  4. Drain your beans.
  5. Add beans and remaining ingredients to the pot. Simmer the chili (cook on low heat, 2-3 setting on stove) for about 10 minutes.
  6. Enjoy your creation!

Thai Chicken Red Curry

I have been searching for a red curry recipe for years to match the one I grew up eating at family dinners in our favorite Thai restaurant. After making several variations of this recipe, my family has ruled this version, though simplistic, to be the closest I have come yet. Enjoy! – Claire Weber

Thai Chicken Red Curry
4 servings

4-5 Tbsp. prepared red curry paste
2 cans coconut milk
3 tsp. brown sugar
½ lb. chicken breast, bite size chunks
3 c. vegetables, cut bite-size
fish sauce or soy sauce to taste
cooked rice
basil (for garnish)

Combine the curry paste, coconut milk, and sugar in a large nonstick skillet or wok over medium heat. Bring the sauce to a simmer, stirring occasionally to keep the sauce from burning. Add the chicken and simmer until chicken is cooked through. Add vegetables, simmer until vegetables are al dente. Stir in fish sauce. Garnish with basil and serve with rice.

See the original magazine article format here.

Lasagna Biancardi

by Michelle Biancardi

With a name like Biancardi, I’m asked about my family’s culinary traditions quite often. In the past I’ve been sheepishly limited to admitting very little Italian-cooking knowledge, but lately I’ve been stepping into the kitchen to change that, guided by the cookbook of my Great-Grandma Biancardi, the 1950’s “Talisman Italian Cookbook” by Ada Boni.

I began cooking Boni’s “Lasagna Old Style” this past summer and have since been introducing various tweaks and twists to incorporate my personal flavor preferences. My version, which I will call Lasagna Biancardi, takes on a Southern Italian flavor profile – more heavily reliant on tomatoes and ricotta than its Northern, béchamel-based counterpart.

Our lasagna will be comprised of five main components:

1. Sauce
2. Meat
3. Ricotta
4. Oven-ready lasagna noodles
5. Mozzarella slices

You’ll find the recipe for how to make or prepare each of these components and how to assemble them detailed in the following pages.

Though a time investment, lasagna is the perfect recipe to get your friends or family into the kitchen. Not only will this recipe produce enough for 10 – 12 generous servings, but it also makes for a great Sunday meal prep. You can split the dish with a friend, and you’ll both have lasagna for days. Enjoy!

Lasagna Biancardi
Preparation Time: 1 hour, 20 minutes
Cook Time: 40 minutes
Yields 10 – 12 generous servings


Component #1: Sauce
This element needs to simmer for 45 minutes to an hour, so start here! 

Equipment
High-rimmed sauce pan

Ingredients
– 2 tbsp olive oil
– 1/2 large sweet onion, minced (Note: you’ll be using the other half for the meat component, so mince the whole thing while you’re at it!)
– 3 garlic cloves, minced
– 3 15 oz cans crushed tomatoes
– 2 tbsp balsamic vinegar
– 1/2 tsp red pepper flakes
– 1 tsp oregano
– 2 bay leaves
– 8-10 leaves of basil, chopped into thin strips
– salt and pepper (to taste)


  1. Warm the olive oil in a high-rimmed sauce pan on low to medium heat. Add the onion and simmer for 2 minutes, stirring occasionally. Add the garlic and saute for about 1 minute, being careful not to let the garlic burn.
  2. Add the crushed tomatoes, balsamic vinegar, red pepper flakes, oregano, and bay leaves. Stir the sauce to combine ingredients.
  3. Cover the sauce with lid and simmer for 45 minutes to an hour on medium to low heat (the sauce should be just shy of bubbling). Stir and check for flavor periodically, adding salt and pepper to taste.
  4. About 5 – 10 minutes before you are ready to assemble your lasagna, add chopped basil to pasta sauce and mix to incorporate the flavors.
  5. Remove the bay leaves from the sauce just before assembly.


Component #2: Meat
While the sauce is simmering, here’s how you wow the crowd.

Equipment
Medium frying pan, wooden spoon

Ingredients
– 1/2 tbsp olive oil
– 1/2 large sweet onion, minced
– 2 garlic cloves, minced
– 1.5 lbs mild Italian sausage
– 1 tbsp oregano

  1. As instructed above, warm the olive oil in a frying pan on low to medium heat. Add the onion and simmer for 2 minutes. Add garlic and saute for about 1 minute.
  1. Add the Italian sausage and oregano. Break up the sausage with a stiff wooden spoon so it’ll be crumbly when cooked. Cook the sausage until the meat is browned through and slightly crispy (Note: You may need to spoon out some of the excess fat while meat is cooking to allow meat to crisp up.).
  2. Take the meat off the heat. Cover a large dinner plate with a paper towel, and transfer the sausage onto the plate to drain excess fat.


Component #3: Ricotta
 This creamy filling makes our lasagna “Southern-style.”

Equipment
Large mixing bowl, small pot

Ingredients
-15 oz part skim ricotta
-3 tbsp shredded whole-milk mozzarella
-3 tbsp shredded Parmesan-Romano
-1 large egg, beaten
-1/2 tsp salt
-1/4 tsp ground black pepper
-8-10 basil leaves, chopped into thin strips

  1. In a large bowl, mix all the ingredients until they are fully incorporated.
  1. Transfer the mixture to a small pot on the stove and heat it through, stirring periodically. (Note: This will ease your effort spreading the ricotta during lasagna assembly.)


Lasagna Assembly
You’re almost there!  You’ll be making three layers, so divide each of the components accordingly. Reserve a quarter of Meat and Sauce for serving.

Equipment
9×13 casserole dish – or a casserole dish that fits in your microwave, sauce pan (from Component #1)

Ingredients
– 12 oven-ready lasagna noodles (or enough for three layers in your casserole dish)
– 16 oz mozzarella log, cut into very thin slices
-3/4 cup shredded whole-milk mozzarella
-Sauce
-Meat
-Ricotta
Optional garnish: chopped basil and additional shredded mozzarella

  1. Preheat your oven to 375F.
  2. Spread a light layer of Sauce on the bottom of a 9×13 casserole dish. This provides moisture to help prevent your oven-ready lasagna noodles from becoming crispy in the oven.
  3. Layer oven-ready lasagna, Ricotta, mozzarella, Meat, and then Sauce in three layers. Spoon some of the remaining sauce around the edges of the dish, making sure the oven-ready lasagna is sufficiently covered in sauce.
  4. Cover the assembled lasagna with damp paper towels, and cook in microwave on high for 10 minutes (Note: This step softens the ‘oven-ready lasagna.’).
  5. Remove the paper towels, and spread the shredded mozzarella evenly over the top layer of the lasagna.
  6. Cover the dish with aluminum foil. Transfer the lasagna to your oven, and bake for 25 minutes.
  7. Combine remaining meat and sauce on stove in sauce pan to create a meat-sauce, and simmer it
  8. on low heat.
  9. After 25 minutes, remove the aluminum foil from the lasagna and bake it for 5 more minutes, allowing the shredded mozzarella to brown.
  10. It’s ready! Remove your lasagna from the oven and let it sit for 5-10 minutes. After plating, spoon meat-sauce over each serving. If you desire, garnish each plate with basil and additional shredded mozzarella.