A Pair of Beet Recipes: Savory and Sweet

Beets are weird and scary, right? The scientific name says it all: Beta vulgaris.

Yet as a former beet skeptic, I can attest to its versatility and deliciousness in all sorts of dishes. If you want to be daring and try your hand at cooking with these common and inexpensive winter vegetables, download the PDF of beet recipes to get started. They’re designed so you can use the WHOLE beet, from root to leaf.

In it you’ll find a recipe for the greens (rich in fiber, as well as Vitamins A and C): prepared with garlic and olive oil, as well as a recipe for the roots themselves: a dense chocolatey cake that you wouldn’t believe had vegetables in it.

A small bunch of beets, with greens. Image courtesy of “More Than Borscht

Homemade Pasta Alla Norma

Homemade Pasta alla Norma – A Taste of Sicily


After traveling abroad to Sicily to study the Mediterranean diet, I became obsessed with homemade pasta. I was never much of a pasta eater before the trip, mostly because I hated how overstuffed it made me feel, but once I tasted true homemade pasta from the kitchens in Sicily my view of pasta drastically changed. I could eat bowls of pasta every single day, and actually feel good after eating the meal, as opposed to feeling like I needed to be rolled out of the restaurant like I usually do in the US. I realized the main difference in this feeling of fullness versus satisfaction was in the method of making the pasta [and the portion sizes]. Since I’ve been back home, I’ve done my best to recreate the signature pasta alla norma dish that I discovered that summer in Sicily.

After doing some digging, I found that Leanne Brown’s Good and Cheap recipe book served as a great guide to making an easy, affordable homemade pasta dish. I’ve combined and adapted the following recipe from two recipes in her cookbook. Although it’s impossible to truly recreate the experience of eating homemade pasta in Sicily, I hope that through making this dish you can get a little glimpse of that experience; both in the taste and good feeling following the meal! So, without furthur ado, I present to you the pasta alla norma!


Adapted from: Leanne Brown’s Good and Cheap


Making pasta from scratch may seem a bit intimidating, but it’s actually pretty easy. I’ve split the recipe up into 3 parts: 1. Making the Pasta, 2. Making the Rest, and 3. Final Touches. While making the dish myself, I found this to be the best order of steps to make the pasta in terms of the prep and time to cook things. Hopefully this works best for you too!

(Takes about 1-2 hours)


Part 1 – Making the Pasta:


  • Ingredients (serves 2 – multiply ingredients for amount of people you’re serving)
    • 5 cup all purpose or bread flour
    • 2 eggs
    • Olive oil
  • Supplies
    • 2 mixing bowls
    • Rolling pin
    • Pot
    • Strainer [for pasta after cooked]
    • Any large cutting knife
    • Plastic wrap


Pasta Method:

  1. Wash your hands! (Although this step may seem self-explanatory, some people do forget – yuck.)
  2. Pour the flour into the mixing bowl.
  3. Create some room in the middle of the flour [in the bowl] and crack the egg.
  4. Using your [clean] hands, mix the egg and flour together until they are properly blended. The flour tends to seem dry at first, so don’t panic if you think that’s the case. Add a teaspoon of water if the excess flour isn’t sticking to the rest or if you think it’s too dry.
  5. Place a tablespoon or two of olive oil into another bowl. Transfer the dough from this bowl to the oiled bowl, and cover with plastic wrap.
  6. Let the flour sit for anywhere between 1-2 hours. This will let some of the moisture from the egg [and water if you added it] release in the flour to make for a good dough ball!
  7. Once an hour or so has passed, the dough should contain more moisture and you should be able to knead it to make a dough ball.
  8. If you’re making the pasta for more than one person, separate the dough ball into smaller balls [1 dough ball per person you’re serving].
  9. Flour your counter top or cutting board in preparation for rolling out the dough ball.
  10. Once you’ve covered your surface of choice with flour it’s time to roll out the dough! [Be prepared this part will give you somewhat of an arm workout.]
  11. [Caution: this part will give you somewhat of an arm workout!] Roll out the dough on the floured surface with a rolling pin. You want the dough to be as pretty thin – almost translucent to where you can almost see through the dough to the counter top. Also, I like to roll the dough into a square as much as possible to make the noodles more even when I cut them.
  12. Once you’ve reached a fairly thin square of dough, it’s time to make the noodles! My favorite way to do this is to roll the dough up and then slice the noodles down the long part of the roll of dough. [See picture for finished cutting product.]
  13. If you’re making multiple servings, be sure to place more flour on the surface before repeating steps 11-12 so the dough doesn’t stick to itself when cutting the noodles!
  14. Now that the noodles are cut and ready to place into a pot, set them aside and have a pot filled about ½ – ¾ of the way to the top with water. Heavily salt the water to give the pasta the best flavor. And hold off on cooking the pasta until the rest of the ingredients have been cooked. [Fresh pasta noodles take only 30 seconds – 2 minutes to make so we’ll return to cooking the pasta later.]


Part 2 – Making the Rest:


  • Now that the pasta noodles are pretty much ready to go, it’s time to make the eggplant and other good stuff! Here’s a list of the ingredients and materials necessary for this portion of the dish:
  • Ingredients [serves 2]
    • 1 large eggplant
    • ¼ cup parmesan
    • ½ tsp red chili flakes
    • 4 cloves garlic [minced or finely chopped]
    • 2 cups canned tomatoes, finely diced
    • Basil
    • Olive oil
    • Salt & pepper
  • Supplies
    • Large pan [either saucepan or skillet]
    • Spatula / Large mixing spoon of some sort
    • Large cutting knife


Tomato & Eggplant Method:

  1. Cut the eggplant. I found that the best way to do this is to cut both the ends off the eggplant, and then cut pieces about 1in wide down the long part of the eggplant.
  2. After completing this step, you should have a good amount of circular eggplant slices (I had about 10-12 pieces). Next you should pile 3-4 eggplant disks on top of each other and cut into quarters. Do this until each eggplant disk is quartered.
  3. Once you have all of the eggplant quarters, continue to cut them until you have eggplant cubes [small enough to eat with one bite of pasta]. Now that the hard part is over, now it’s time to cook!
  4. Place olive oil in the saucepan or skillet and set the heat to medium-high.
  5. Once the pan is hot and the oil is dispersed across the pan [about 30 seconds], place the eggplant slices into the pan and sprinkle the cubes with salt. Let the eggplant slices cook in the pan for about 5 minutes, stirring occasionally. (If the eggplant begins to look dry, add a touch of water.)
  6. After 5 minutes, the eggplant cubes should start to look a little brown on the outside. Add the garlic and chili flakes to the pan and stir around until evenly dispersed.
  7. Now it’s time to add the tomatoes! Add the tomatoes to the pan and let them cook for 15 minutes. Stir occasionally.
  8. Set aside your Parmesan and basil so they’re ready to add later.
    1. For basil, I like to chop the leaves into smaller pieces, but you can always just tear the leaves apart. It’s whatever size you want them to be!


Part 3 – Final Touches:


  1. Now that the eggplant and tomatoes are cooking, it’s time to return to the pasta!
  2. Bring the pot with salted water to a boil. [Cover pot in order to make water boil faster.]
  3. While the water is coming to a boil, return to your pasta noodle rolls. Unroll the pasta dough and make sure that the dough isn’t sticky. [If the dough seems a little sticky on the inside part of the roll, grab a handful of flour and lightly flour the noodle until it’s no longer sticky.] Place the uncooked, unrolled noodles in the original bowl you used to mix the dough.
  4. After you’ve unrolled all the noodles and placed them in a bowl, you’re ready to add them to the pot to cook the pasta whenever the water reaches boiling! Leave the top off of the pot while the pasta is cooking so you can keep an eye on the noodles.
  5. Return to your eggplant & tomato pan to stir again. Add half of the Parmesan cheese and basil. Continue to stir. [I like to add a sprinkle or two of salt and pepper to both cooking dishes at this point for flavor, but this step is up to you!]                  
  6. Once the pasta has been cooking for max 2 minutes, check on the noodles to see if they’re done. To do this, I usually grab a fork and take a noodle out to see if it tastes good. If you think it’s good to go, drain the pasta in the sink with a pasta strainer. Let cool for a minute or two.
  7. Turn the heat off of the eggplant and tomato pan. Pour the pasta in the second bowl you used to let the dough sit. Pour the tomato and eggplant ingredients on top.
  8. Mix the ingredients all together. Add some olive oil, salt, pepper, and the rest of the parmesan and basil, and viola! The dish should be ready to serve and eat.
  9. Enjoy yourself a little taste of Sicily! [I recommend to enjoy with a glass of wine if you’re 21 and up :)]

Recipe (sausage balls)

Sausage Balls

Coming from a family of avid hunters, we always have an excess of meats in the fridge. We are always in need of simple recipes to use these meats, and this is one of my favorites. These are the perfect snack for your Super Bowl watch party or a grab & go breakfast treat. The best part is all of the ingredients cost less than $15 and will always a hit with friends.


Ingredients:

  • 1lb ground sausage
  • 3 cups baking mix (Bisquick)
  • 4 cups grated cheddar cheese (or whatever grated cheese is on hand)
  • ½ tbs all-purpose salt-free seasoning (Mrs. Dash)

Supplies:

  • measuring cups
  • large bowl
  • baking sheet
  • aluminum foil


Time: 35 minutes                                                 Yield: approximately 3 dozen


Directions:

Preheat the oven to 375 degrees F. Cover a baking sheet with aluminum foil, and spray with cooking spray.  Combine all ingredients in a large bowl. Mix well with your fingers. The mixture will be very crumbly. Form into 1-inch balls (it is important the balls are all the same size so they cook evenly), squeezing the mixture so it holds together, then rolling it between the palms of your hands to form balls.  If the mixture is not holding together, add a few tablespoons of water. Place the balls on the baking sheet (leave about 1-inch of space between each ball). Bake for 18 to 20 minutes or until golden brown. To prevent sticking, move the balls with a spatula halfway through cooking. After cooking, lay the sausage balls out on paper towels and allow them to cool.


Note: This recipe can be adapted to fit the ingredients you have available or your specific tastes. You can make an Italian version of it by substituting Italian seasoning and mozzarella cheese and serving it with marinara sauce. You could also give it a Mexican twist by using Monterey jack cheese and chili powder and serving it with salsa. The opportunities are endless!

Banana Foster Cake

Like most college students, I have a busy schedule, get distracted, and forget trivial things like…the bananas that I bought from the grocery store…until they are spotted with brown flecks and super ripe. BUT this recipe is the perfect remedy for that. This recipe uses all of your forgotten, but now ripe and super sweet bananas to make a delectable, caramelly dessert that is an update of the classic banana bread.

Meet…banana foster cake.

This recipe needs ingredients that most college students probably already have in their pantry. Plus, it’s quick and easy, which makes baking it the perfect study break activity. Try it and share with your friends. Trust me. You and your friends can thank me later.

BANANA FOSTER CAKE
Adapted from Averie Cooks’ Upside-Down Banana Bread Cake
YIELD: one 8×8-inch cake

INGREDIENTS:

Topping
4 tablespoons unsalted butter
1/2 cup brown sugar, packed
1/8 teaspoon cinnamon
a tiny pinch of salt
about 1 large or 2 medium ripe bananas, sliced into 1/2-inch thick rounds*

Cake
1 cup all-purpose flour
2 teaspoons baking powder
1/4 teaspoon cinnamon
1/4 teaspoon salt
1 large egg
1/2 cup brown sugar, packed
1/4 cup granulated sugar
1/4 cup canola or vegetable oil
1/4 cup sour cream or plain Greek yogurt
2 teaspoons vanilla extract
1 cup ripe bananas, mashed (about 2 large bananas)
1/4 cup pecans or walnuts, chopped (optional)


DIRECTIONS:

  1. Preheat oven to 350F. Line an 8×8-inch pan with aluminum foil**, and spray with cooking spray. Set aside.
  2. Topping – To a large sauce pan, add the butter, brown sugar, and cinnamon. Heat over medium heat to melt butter while constantly whisking to incorporate the sugar well into the butter as it melts.
  3. Once butter has completely melted, increase the temperature to boil the topping mixture for 20 to 35 seconds. Pour sauce immediately into prepared pan.
  4. Add the banana slices evenly over the pan. Set aside.
  5. Cake – In a medium bowl, sift and whisk together the flour, baking powder, cinnamon, and salt. Set aside.
  6. In a separate large bowl, whisk together the egg, sugars, oil, sour cream or Greek yogurt, and vanilla until no lumps remain.
  7. Stir in the mashed bananas.
  8. Mix the dry mixture into the wet mixture. Don’t overmix (or the cake will be tough)!
  9. Optional – Stir the pecans and/or walnuts into the batter.
  10. Pour batter over the banana-caramel topping. Smooth batter lightly and evenly with a spatula, as needed. Bake for about 40 to 45 minutes (or until a toothpick inserted in the center comes out clean, or with a few moist crumbs but no batter).
  11. Cool cake for 10 to 12 minutes before inverting onto a large plate. Serve while warm (and optionally with ice cream).
  12. Enjoy and share!

*Slice the bananas into thicker rounds, or they might disappear into the caramel topping.
**If you line the pan with foil, it’ll be easier to lift cake out of pan.

Ryan’s Delicious Dessert

Ryan’s Delicious Dessert

Are you a chocolate fan? Are you tired of eating the same old dessert that you have been eating your whole life? Do you want to try something new? If so, wow, do I have a perfect recipe for you! Ryan’s Delicious Dessert is full of chocolate surprises. Ice cream, toppings, cake balls, Oreos, to even more chocolate, Ryan has created a masterpiece that is waiting for you to try! While the dish may taste incredible, the design is also made to draw your attention and make your mouth water. I have been eating the same desserts ever since I can remember and have witnessed the same things on every menu so I decided it is time to take a stand and make a new dessert. Try it out!

Ingredients:

  • 3 scoops of chocolate ice cream in the middle of your plate.

To create the delicious chocolate/Oreo cake balls:

  • 32 Oreo Cookies (300g, 10.5oz)
  • 300g cream cheese 10.5oz
  • 400g chocolate 14oz (Hershey’s preferred)

These balls will surround the ice cream that is in the middle of the plate.

On top of the ice cream, you will sprinkle on

  • 25 chocolate chips
  • A small amount of chocolate sprinkles (However much you prefer)

In order to make this dessert to the best of its abilities, you must start with the cake balls as they can take a good amount of time to make.

Preparation for cake balls:

  • Break the 25 Oreos with your hands strongly
  • Place the crushed up Oreos into a blender
  • Close the blender and grind up those cookies for 30 seconds (or until the cookies are soft)
  • Place them in a large bowl and add all of the 300g of cream cheese in the bowl
  • Mix both ingredients until you get a homogeneous dough
  • Take a tablespoon of dough with your hands and make it into a small ball shape
  • Put all balls on a tray with parchment paper
  • When all balls are made, put the tray in the freezer for about an hour
  • After the hour, place a small pot over another large one with hot water
  • In the small pot, put your 400g of chocolate in
  • Let it all melt
  • Once melted, place a ball in the chocolate and coat it well
  • Do it quickly so that the ball does not thaw in the chocolate
  • After coating the ball, place the ball back onto the parchment paper
  • When done coating all, place them in the fridge for a minimum of three hours
  • Take out and enjoy!


Supplies:

  • Blender
  • Parchment Paper
  • Small pot
  • Large pot
  • Refrigerator


TEA CAKE RECIPE

The scent of wet cedar wood on a crisp fall afternoon in central Louisiana floats through the open window kitchen. However that scent filling you home is not alone, there are cookies cooling on the open window sill embracing your nose in a comforting scent of cookies, something that makes your eyes water with joy. The whiff of the air was a sensual experience that I have not forgotten since I was 11 years old. This recipe is an adaptation of my late grandmother’s tea cake recipe is something I need to share with the world. A tea cake is a cookie that is believed to have their beginnings in slavery, are not only easy to make, but they can brighten any darkness you can have. When I would cry she would tell me “this is my gift of love for you my child, a piece of my heart passed to you,” to this day I hold that to my heart. She helped me with these tiny bundles of joy; it is my turn to teach some one new.

Grandmom’s Southern Tea Cakes (adapted)

Preparation will take about 50 mins

Baking time is 8 mins

About 1 hour for completion of the cookies

  • 1 cup of softened butter
  • 1 ¾ cups of white sugar
  • 2 eggs
  • 1 teaspoon vanilla extract
  • 3 cups of all purpose flour
  • ½ teaspoon of baking soda
  • ½ teaspoon of salt
  • ¼ teaspoon of ground nutmeg
  • 1 teaspoon almond extract

Tools: Baking sheet, spoon, cutting board, measuring cup, tea/table spoons, a mixer (hand and/or standing), spatula, 2 bowls (large and medium) a butter knife, and a rolling pin

Tips

  1. Using butter on the pan instead of cooking oil will help the cookies stay moist
  2. Refrigerating the cookies 10 minutes after the oven help maintain their freshness
  3. You can add food coloring to the batter to liven up the cookies
  4. Parchment paper can be used for easier cleanup/removal of cookies from the pan.

Preheat the oven to 325 degrees F (165 degrees C). In a medium bowl, blend the butter and sugar until smooth. Stir in the almond extract, and then proceed to beat in the 2 eggs one every 5 minutes. In a separate larger bowl blend all of the dry ingredients: flour, baking soda, salt and nutmeg. Then combine the wet ingredients with the dry ingredients, and proceed to mix them all together until thick and creamy. Grab a cutting board and pat some flour on it, then knead dough for a few turns until smooth. Cover and refrigerate for about 10-15 minutes, until batter is firm. On a lightly floured surface, roll the dough out to ¼ inch in thickness. Cut the dough ½ inches apart and then roll them with your hand and place on the buttered cookie sheet. Use a spoon to pat the cookies into a circle, and then place them in to the oven for about 8-10 minutes. Let them cool on the oven for 5 minutes, and then share with others and enjoy.


Original Recipe: http://allrecipes.com/recipe/25766/grandmas-old-fashioned-tea-cakes/


Apple Rum Raisin Bread Pudding

This dish brings me back home to the cool winter nights in Seattle. It can be easily heated up in the microwave, and I love to serve it over a rich vanilla bean ice cream. Seattle in the winter is really cold, grey and gloomy, but this dish was able to warm me up from the inside out.

This dish has developed and changed as I have grown up. At one time I scoffed at bread pudding because it didn’t seem, or sound, like a true dessert. However, over time I grew to accept, love and eventually alter it to better enhance the flavors to fit my pallet. This recipe is one of my favorites as it combines sweet fruit with savory rum to create a medley in your mouth. While there are recipes without rum, I have recently turned 21 and have begun cooking with more alcohol to develop richer and more complex flavors. I have also provided a sauce recipe, while it is not a necessary part, I always enjoy sauces with my food; make if desired.

Yields: About 8-10 Servings

Ingredients:

Apple and Raisin Mixture:

  • ½ Cup Raisins
  • 2 Tbsp Spiced Rum
  • 1 Large Apple, peeled, cored, sliced thin into ½ inch pieces
  • 2 Tbsp Butter
  • Dash of Ground Cinnamon
  • About 9-10, ½ inch slices of French Brioche, cubed into ½ inch pieces

Bread Pudding:

  • 1 tsp Ground Cinnamon, plus extra
  • 3 Cups Milk
  • 3 Tbsp Butter
  • 1 tsp Vanilla Extract
  • 1 tsp Ground Cinnamon
  • ¾ Cup Brown Sugar, packed
  • 4 eggs, beaten

(Optional) Sauce:

  • 1 Cup Brown Sugar, Packed
  • ½ Cup Butter
  • ½ Cup Whipping Cream
  • 2 Tbsp Spice Rum
  • ¾ tsp Ground Cinnamon

Instructions:

Bread Pudding:

First Prepare the apple and Raisin Mixture

  1. Place 1 Tbsp of spiced rum in microwave safe bowl and stir in raisins
  2. Microwave bowl for 30 seconds, and stir afterwards
  3. Let raisins sit and absorb rum while preparing apple mixture.
  4. In a medium size saucepan, melt butter over medium heat
  5. Stir in apple pieces, 1 Tbsp spiced rum, dash of cinnamon, and raisin mixture. Raise heat to medium high.
  6. Cook until apples are soft and slightly browned, stirring occasionally. (About 10 minutes)
  7. Remove from heat and combine with bread cubes in a large bowl. Light fold together.

Next create the custard part of the bread pudding.

  1. In a large saucepan over medium heat, combine milk, butter, vanilla, cinnamon, and brown sugar. Simmer until sugar dissolves and mixture is smooth, whisking occasionally.
  2. Once mixture is smooth remove from heat and let cool for about 5 minutes. Then combine with bread, apples and raisins in your large bowl. Lightly fold together and let sit for about 30 minutes to allow the bread to absorb the liquid. Bread should be soggy.

Preheat oven to 350 degrees F

  1. Add beaten eggs to bowl and stir in till well combined.
  2. Pour mixture into buttered 1 ½ quart baking dish.
  3. Bake uncovered for 50 minutes.

Instructions for Sauce:

  1. Stir Brown Sugar and butter in large saucepan over medium heat until melted and smooth
  2. Add cream, rum, and cinnamon and let simmer
  3. Simmer until sauce thickens and slightly reduces. (Be careful not to reduce too much or sauce will thicken too much, if this happens just add about a tablespoon of cream until sauce thins out to desired texture.)
  4. Serve Warm

Adapted and Inspired from:

All Recipes, Rum Raisin Bread Pudding with Warm Vanilla Sauce

Epicurious, Spiced Rum Sauce

Jen Segal, Apple Rum Raisin Bread Pudding

Patrick and Gina Neely, Rum Raisin Bread Pudding


soft chocolate chip cookie recipe by HyeJi

Chocolate chip cookies are one most generally loved sweets. I love chocolate chip cookies but most of them that are in the markets are too sweet for me. I know basic knowledge about baking so I tried to make chocolate cookie on my own a year ago and it worked out great. It had deep chocolate taste and moderately sweet. I tried many different versions, one with chocolate chip on top or one without chocolate chip and just the cacao taste. The cookie itself does not contain a lot of sugar, so it was better to stick some chocolate chips as topping. It is softer than normal cookies and can be used in making cakes such as cookie cakes. This is optional. Its tastes differ by what cocoa powder you use. I use tall house cocoa powder. It will make about 20 cookies. The directions are easy to follow and you can find all the ingredients at any grocery store. Make your own cookie and enjoy it!!

Ingredients :

  • Butter 100g
  • Sugar powder 120g
  • 2Eggs
  • Cocoa powder 30g
  • Milk 30g
  • Bake flour (normal flour is okay) 180g
  • chocolate chips

Directions :

  • Micromave butter for 30 secs to melt and put in large bowl.
  • Add sugar powder.
  • Add 2 eggs total but put in one egg and mix completely before adding another egg.
  • Add cocoa powder and mix well
  • Milk is optional, but it gets softer with milk added.
  • Sift bake flour and mix well until the mixture looks like a dough.
  • Place the oil paper on flat oven pan and put the mixture into pastry bag and squeeze on the oil paper. The shape does not matter but it cannot be too high. (I will include the photo I made).
  • Stick some chocolate chips on the squeezed cookie dough to add some more sweet taste.
  • Pre-heat the oven in 320F and bake for 10 mins.
  • Enjoy your delicious chocolate chip cookies!!

 this is the shape of cookie dough I made.

Chili-Lime Chicken

Chili-Lime Chicken

This is a wonderful, tasty, dish that is easy to make and only takes about 20-30 minutes to cook. It is my own spin on a common dish; chili-lime chicken. I chose this dish because all the ingredients are either common or cheap, making it the perfect meal for any college student. I added a kick to it to spice things up, as well as giving the chicken an assortment of vegetables. (Serve with vegetables for a healthy meal, or just use the marinade for a delicious piece of meat).

Serves: 2


Ingredients

1 lb. chicken

Marinade:

2 tbsp. Olive Oil

1 ½ tsp Chili Powder

½ tsp Cumin

¾ tsp Salt/Pepper

2 tbsp. Lime Juice (Optional: 1 Lime Zest)

1 tsp Cilantro

½ tsp Garlic Powder

½ tsp Onion Powder

Other:

2 tbsp. Olive Oil

1 tsp Chili Powder

½ tsp Salt/Pepper

2 Bell Peppers (Sliced)

¾ Onion (Sliced)

Optional: 2 Jalapenos (Sliced)


Instructions

  1. Mix the marinade together and coat the chicken
    1. Let sit for at least 30 minutes
  2. Heat the pan to Medium/High heat & add 1 tbsp. Olive Oil
  3. Put coated chicken on pan for 5-7 minutes covered
  4. Season vegetables with remaining chili powder, salt, and pepper
  5. Add the remaining olive oil & the vegetables and flip the chicken
    1. Cook 5-7 minutes covered
  6. Remove from heat once the chicken and vegetables are fully cooked.
  7. Serve immediately or refrigerate, Enjoy!

Spaghetti Carbonara

Recipe by Matthew Kimm

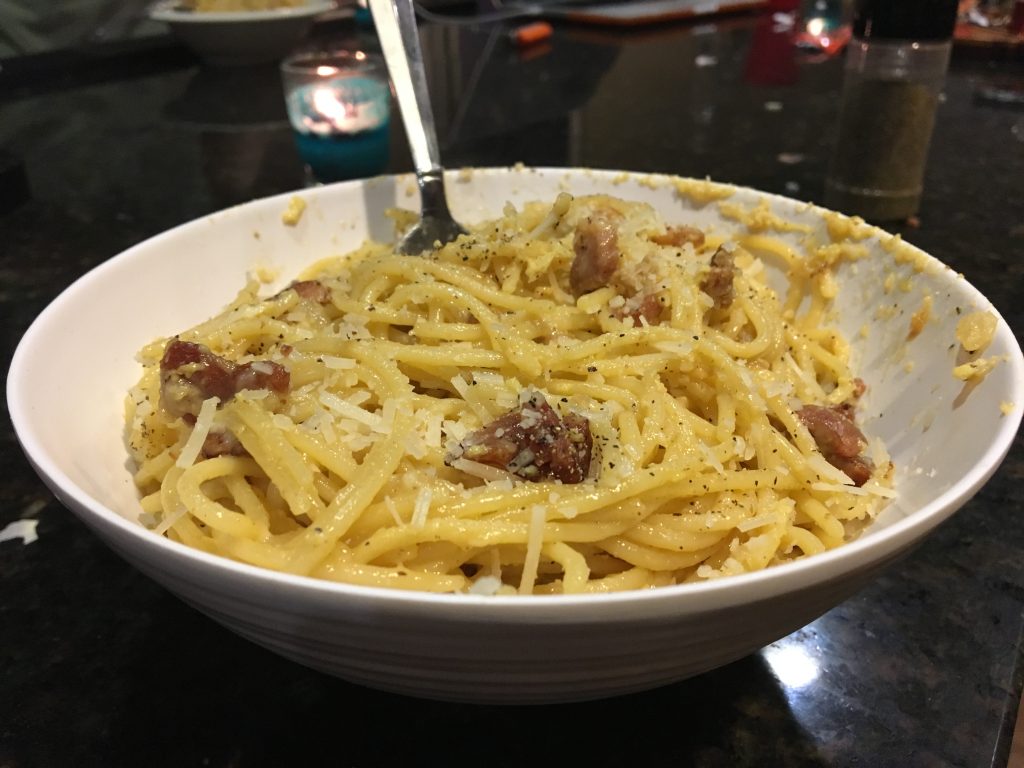
This is a simple, delicious dish. If you’ve never had carbonara, it may sound odd–breakfast food and pasta? It works, and it works well. The pasta soaks up the flavors of the onion, garlic, and bacon in a delicious cream sauce, best served with a hearty topping of parmesan cheese.

This is one of the first meals that comes to mind when I find myself really hungry. It’s a cheap meal that’s good and good for you. Well, no, it’s not exactly the healthiest meal but it is absolutely delicious and quite easy to make. It’s a hearty meal that should provide you leftovers for days. What it lacks in nutrition it makes up for in tastiness.

Ingredients (serves six):

  • 1 pound (1 package) of spaghetti
  • 1 White Onion
  • 2 Cloves of Garlic, minced
  • 6 slices of bacon
  • 6 eggs
  • ½ cup of Parmesan cheese
  • Pinch of salt
  • Pinch of black pepper
  • 1/4 cup heavy cream (optional)

Instructions

1. Boil water for the spaghetti.

2. While the water is boiling, chop the white onion and the slices of bacon into small pieces. Mince the garlic. Separately, whisk the eggs and the cream and set aside.

3. Add spaghetti to the boiling water. Cook for the box’s recommended amount of time.

4. Add the onion, garlic, and bacon into the skillet or saucepan. Cook on medium heat until the onions are translucent and the bacon is at your desired crispness. This should take at least five minutes, but the cooking time is dependent on what type of pan you are using. If you are about to overcook the onions and bacon before the pasta is ready, turn off the heat.

5. After the pasta finishes boiling, drain the pasta and add the pasta to the skillet or saucepan with the garlic, onions, and bacon. Pour the egg/cream mixture on top.

6. With the heat on medium low, stir the pasta together with the other ingredients until they are spread evenly. Do not allow the eggs to cook and stick to the bottom of the dish. As soon as the eggs just begin to curdle, turn the heat off.

7. Add salt, pepper, and parmesan. Toss again. The dish is ready.

8. Serve with a sprinkle of parmesan and black pepper on top. Enjoy.